
Preferences
Open the Preferences dialog from Tools → Preferences. Settings are grouped under three categories in the tree on the left — General, File, and Tools — each with a few sub-pages. Click Apply to save without closing, or OK to save and close.
- General — Visual, Colors, Fonts, Print
- File — Directories, Backup, Associations, Filters, Syntax Types
- Tools — User Tools, User Macros
General
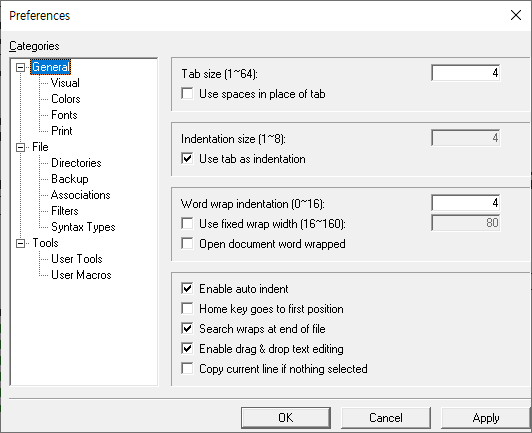
Tabs, indentation, word wrap, and general editing behavior.
- Tab size (1~64): Width of a tab character, in columns.
- Use spaces in place of tab: Insert spaces instead of a tab character when you press Tab.
- Indentation size (1~8): Number of columns to indent or outdent by.
- Use tab as indentation: Use a tab character (rather than spaces) for indentation.
- Word wrap indentation (0~16): Extra indentation applied to the wrapped continuation of a long line.
- Use fixed wrap width (16~160): Wrap at the given column instead of at the window’s right edge.
- Open document word wrapped: Turn word wrap on automatically for every document you open.
- Enable auto indent: Keep a new line at the same indentation as the previous one.
- Home key goes to first position: Make the Home key jump to the very start of the line (column 1) instead of the first non-blank character.
- Search wraps at end of file: When a search reaches the end of the file, continue from the top.
- Enable drag & drop text editing: Move or copy selected text by dragging it with the mouse.
- Copy current line if nothing selected: With no selection, Copy/Cut acts on the whole current line.
General > Visual
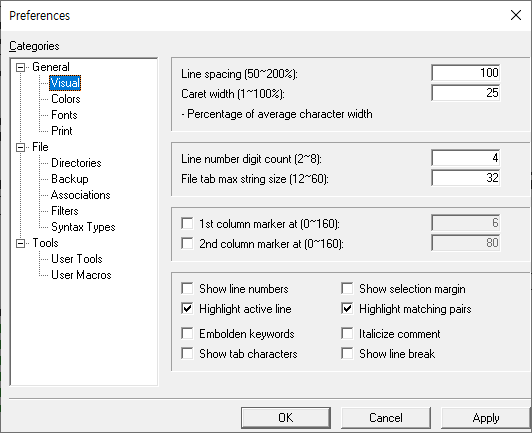
How documents are drawn on screen and in print.
- Line spacing (50~200%): Spacing between lines, as a percentage of the line height.
- Caret width (1~100%): Caret width in Insert mode, as a percentage of the average character width. (In Overwrite mode the caret spans the whole character.)
- Line number digit count (2~8): Width reserved for the line-number margin.
- File tab max string size (12~60): Maximum length of file names shown on the file-selection tab bar; longer names are abbreviated with an ellipsis.
- 1st / 2nd column marker at (0~160): Draw a vertical guide line at the given column — helpful for fixed-format languages. Enable each with its checkbox.
- Show line numbers: Show line numbers in the left margin.
- Show selection margin: Show a narrow selection margin along the left edge.
- Highlight active line: Highlight the line the caret is on (fill color is set on the Colors page).
- Highlight matching pairs: Underline matching brackets when the caret is on one of them.
- Embolden keywords: Draw language keywords in bold.
- Italicize comment: Draw comments in italic.
- Show tab characters: Show tabs as visible marks.
- Show line break: Show a mark at the end of each line.
General > Colors
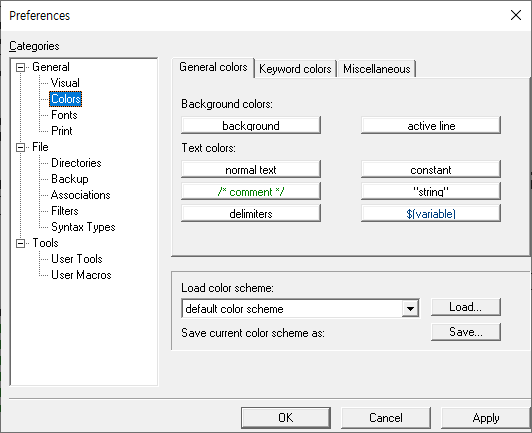
The colors used to draw documents on screen and in print. Click a color button to change it. Three tabs:
-
General colors — background and active line, plus text colors for normal text, constants, comments, strings, delimiters, and variables.
-
Keyword colors — colors for each keyword group defined by the syntax.
-
Miscellaneous — the remaining editor colors.
-
Load color scheme: Pick a saved scheme from the list and click Load to apply it as a whole.
-
Save current color scheme as: Click Save to store your current colors as a named scheme.
General > Fonts
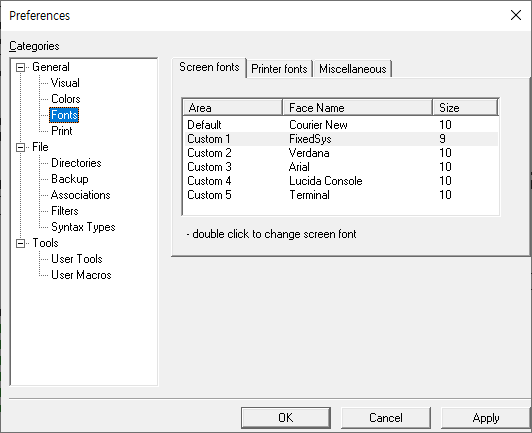
Register the fonts used to draw documents, with tabs for Screen fonts, Printer fonts, and Miscellaneous. Each row is a slot (Default, Custom 1–5) showing its face name and size — double-click a row to change it. Once registered, switch between them quickly from View → Screen Fonts / Printer Fonts.
General > Print
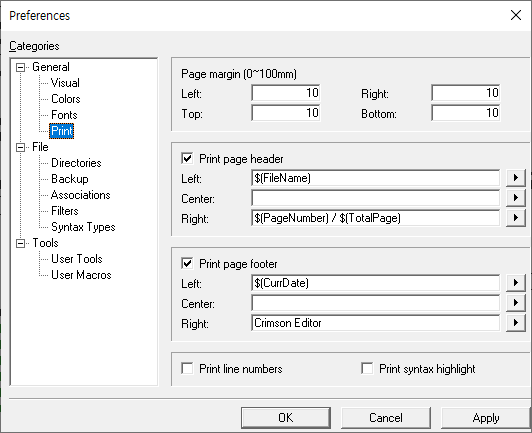
- Page margin (0~100mm): Left / Right / Top / Bottom margins for printed pages.
- Print page header / Print page footer: Print a header and/or footer, each with Left / Center / Right fields. Use the ► button to insert variables such as
$(FileName),$(PageNumber),$(TotalPage), and$(CurrDate). - Print line numbers: Include line numbers in the left margin.
- Print syntax highlight: Print in syntax colors (for color printers); otherwise the document prints in black.
File
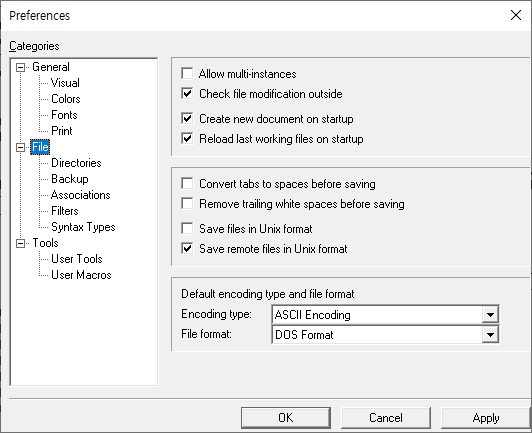
Startup, saving, and default encoding.
- Allow multi-instances: Allow more than one copy of Crimson Editor to run at the same time.
- Check file modification outside: Warn when a file open in the editor is changed by another program.
- Create new document on startup: Start with an empty document when there is nothing else to open.
- Reload last working files on startup: Reopen the files from your previous session at startup.
- Convert tabs to spaces before saving: Replace tabs with spaces when saving.
- Remove trailing white spaces before saving: Strip trailing whitespace from every line when saving.
- Save files in Unix format: End lines with LF only (instead of CR/LF).
- Save remote files in Unix format: The same, for files saved over FTP.
- Default encoding type / File format: The character encoding (e.g. ASCII, UTF-8) and line-ending format (DOS / Unix / Mac) used for new files and as the default when saving.
File > Directories
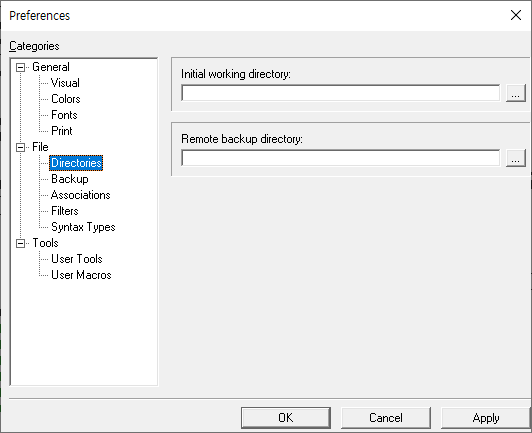
- Initial working directory: The directory opened in the Directory Window when Crimson Editor starts. If left empty, the last-used directory is opened instead.
- Remote backup directory: A local directory where copies of files edited over FTP are kept.
File > Backup
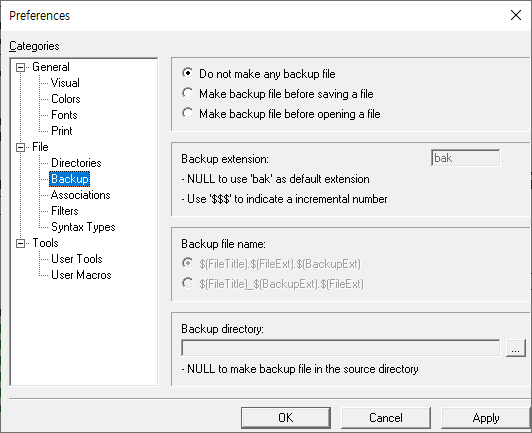
Choose when backups are made:
-
Do not make any backup file
-
Make backup file before saving a file
-
Make backup file before opening a file
-
Backup extension: Extension for backup files. Leave empty to use
bak; include$$$to insert an incrementing number. -
Backup file name: The naming pattern —
$(FileTitle).$(FileExt).$(BackupExt)or$(FileTitle)_$(BackupExt).$(FileExt). -
Backup directory: Where to write backups. Leave empty to keep them beside the source file.
File > Associations
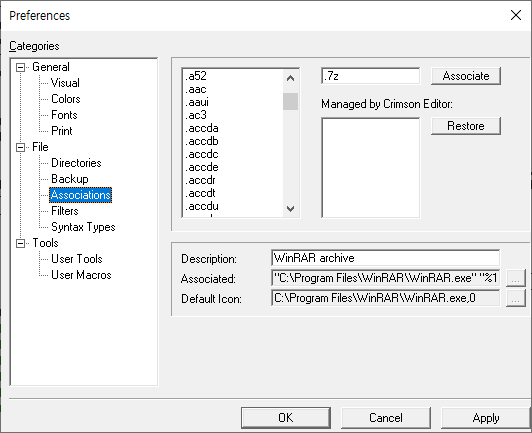
Associate file extensions with Crimson Editor so double-clicking them in Windows Explorer opens them here.
- Pick an extension from the list (or type one) and click Associate. Extensions currently managed by Crimson Editor appear in the right-hand list; select one and click Restore to hand it back to its previous program.
- Description / Associated / Default Icon: The registered description, the open command, and the icon Explorer shows for the selected extension.
File > Filters
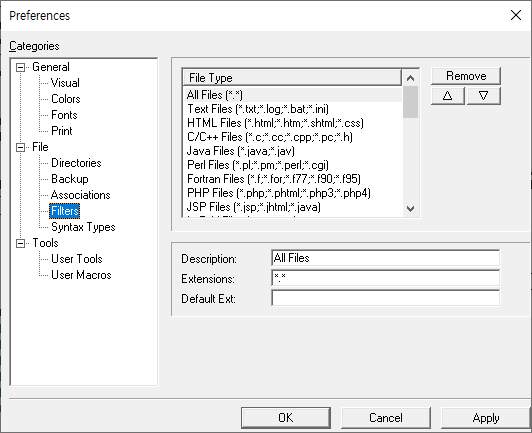
The file filters offered in the Open / Save As / Open Remote / Save As Remote dialogs, and used by the Directory Window. Add, remove, or reorder entries with the buttons.
- Description: The label shown in the file-type dropdown (e.g. “C/C++ Files”).
- Extensions: Semicolon-separated patterns (e.g.
*.c;*.cc;*.cpp;*.h). - Default Ext: The extension appended automatically when you save without one.
File > Syntax Types
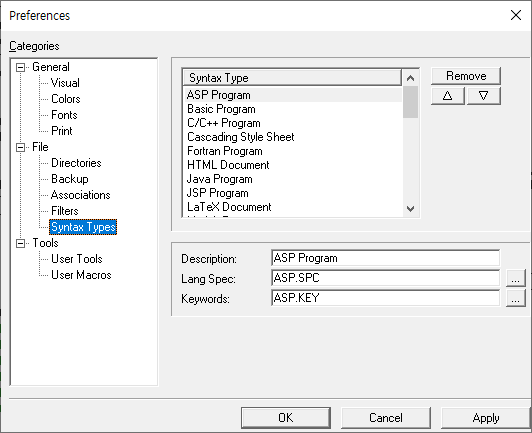
The syntax types listed in the Document → Syntax Type menu. Add, remove, or reorder them.
- Description: The name shown in the menu (e.g. “C/C++ Program”).
- Lang Spec: The language specification file (
*.SPC). - Keywords: The keyword file (
*.KEY).
Adding a language needs both files. See the syntax file guide for how to write your own, or the supported languages list for ones contributed by others.
Tools
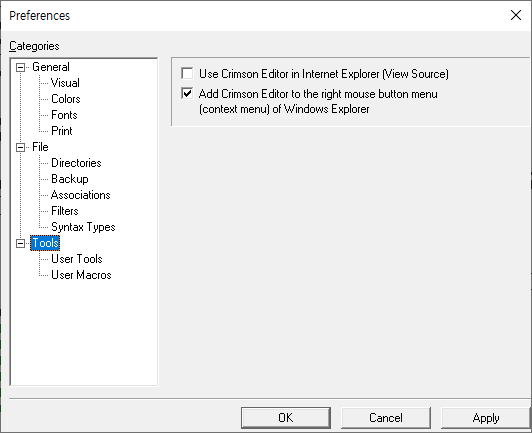
- Use Crimson Editor in Internet Explorer (View Source): Make Crimson Editor the “View Source” editor for Internet Explorer.
- Add Crimson Editor to the right mouse button menu (context menu) of Windows Explorer: Add an “Edit with Crimson Editor” entry to Explorer’s right-click menu.
Tools > User Tools
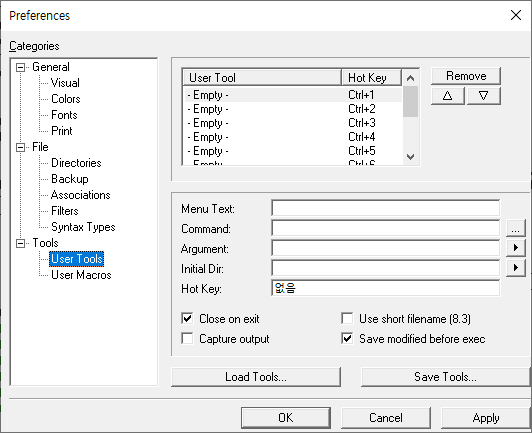
Register external commands you can run from the Tools menu with a single hot key — compilers, interpreters, or any Windows command. Select a slot, fill in the fields, and reorder or remove entries with the buttons. Use Load Tools… / Save Tools… to import or export your whole tool set.
- Menu Text: The label shown in the Tools menu.
- Command: The program to run.
- Argument: Command-line arguments. Use the ► button to insert variables such as
$(FileName),$(FileDir), or$(CurrWord). - Initial Dir: The working directory for the command.
- Hot Key: The shortcut that runs the tool.
- Close on exit: Close the console window automatically when a console command finishes.
- Capture output: Send the command’s output to the Output Window.
- Use short filename (8.3): Pass the short (8.3) form of file names to the command.
- Save modified before exec: Save the document before running the command.
See the How-Tos for worked examples — compiling C/C++, running Perl, and more.
Tools > User Macros
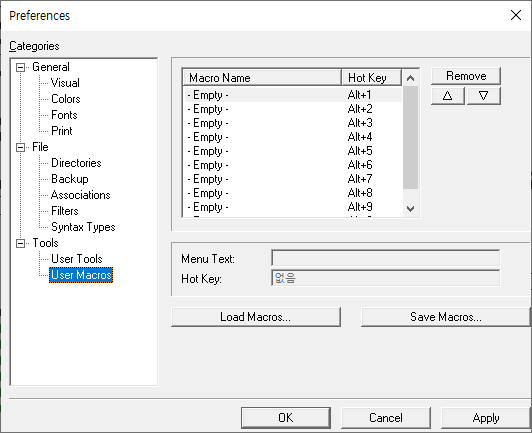
Keystroke macros you have recorded, each runnable from the Macros menu by a hot key. Rename, reorder, or remove them here, and use Load Macros… / Save Macros… to import or export.
- Menu Text: The label shown in the Macros menu.
- Hot Key: The shortcut that plays the macro.